
 Custom bag partner
Answer first
Reinforce the Weak Point You Can Identify
If the body folds when you want it to stand, work on the side panels. If the base sags or an insert slides, work on the bottom. If the load pulls on a narrow top edge, work on the handle attachment and the fabric behind it. One extra layer everywhere can add bulk without solving the actual problem.
For a simple sewn tote, the methods below are construction options drawn from the American Sewing Guild's Tote Tactics. They are not a guaranteed fix for a damaged bag or a tested carrying capacity. If a bag already has torn stitching, inspect and repair the failed material and seam before adding a patch.
Original zone map
Three Places to Work on a Tote
1. Side panels: add stable backing before assembly
For a lined tote that needs a firmer body, cut compatible interfacing, fleece or sewable foam to the outer side-panel shape and apply or stitch it before joining the bag. The American Sewing Guild notes that backing may be kept out of seam allowances to reduce bulk. If using fusible backing, test it on a scrap of the actual fabric and follow that backing maker's heat and cooling instructions; some coatings or finishes may not tolerate the process. Check the panel still bends and turns as the chosen seam construction requires.
2. Base: fit and secure a separate insert
For a flat-bottom tote, make an insert to the finished base footprint after the shell is constructed. Place it between shell and lining when the pattern allows, or cover it in fabric in an unlined tote. Lightly securing it at the side seams can reduce shifting. Its corners must not rub through the shell or block the bag from folding as intended. A base insert changes shape support; it does not by itself certify the bottom seam or the whole bag for a heavier load.
3. Handles: support the top and attachment area
For an unlined tote, a double-fold top hem can give the handle attachment more structure. Fabric handles can be backed with interfacing or fleece and topstitched along both edges. For finished handles sewn on the outside, turn under raw ends, place a compatible support patch behind the attachment, and stitch a square with an X through the designed layers before adding a lining. The strap path, stitch placement and patch size still need to be checked on the actual material and sample.
Before approving construction
Check the Reinforcement in a Loaded Sample
We can help identify the right zone if you share the tote's finished size, main fabric, lining, target contents and a photo of where the current sample bends or strains. Without those details, “make it stronger” could mean firmer sides, a steadier base or a safer handle connection; those require different changes.
- Look inside at the handle backing and top hem, not only at the outside stitch pattern.
- Set the intended contents inside and see whether the base insert moves, corners distort or seams pull.
- Confirm that any backing has not made turned seams too thick, wrinkled a coated fabric or changed the intended foldability.
- Agree on the relevant project-specific tests before making a load or durability claim.
Our custom tote brief helps record dimensions and carry method; the quality inspection guide explains what to compare against the approved sample.
A useful message to send: “The sides of this tote collapse when partly filled, while the bottom and handles feel acceptable. Could we compare a side-panel backing on the next sample without changing the outer fabric?”
Apply this to a catalog style
Point to the Zones You Want Reviewed
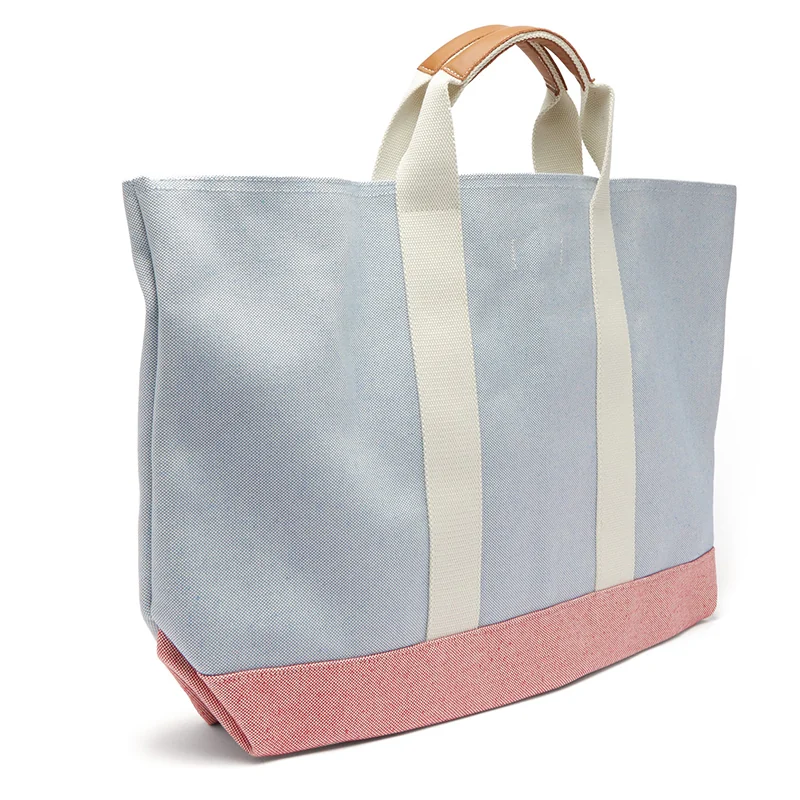
AltusPack catalog style · AP-R3-032
Custom Waxed Canvas Beach Tote Bag with Zipper Closure
What the photo shows: Long handles, a broad side panel and a contrasting lower panel.
How to use this example: Mark which of those zones you want to hold shape or carry the intended contents, then inspect the hidden layers on a physical sample.
Evidence limit: The photo does not reveal interfacing, insert material, handle backing, seam construction, fibre content or tested carrying capacity.
Source and limits
Where These Construction Options Come From
American Sewing Guild, “Tote Tactics” describes side backing, bottom inserts and handle attachment options. Ann Saunders, Design, Manufacture and Sell Your Bag Collection (first published 2024), PDF pp.196-203 / book pp.173-180, explains seam and panel-construction tradeoffs. The zone map, decision order and sample questions here are AltusPack editorial synthesis. Neither source validates a load number or the construction of this catalog style.